شرح Flutter UI: بناء واجهة تطبيق دردشة مع القصص باستخدام Flutter SDK
مقدمة: لماذا تُعد واجهات تطبيقات الدردشة مهمة؟
أصبحت تطبيقات الدردشة من أكثر الأدوات استخداماً للتواصل عبر الإنترنت، لأنها توفّر وسيلة سريعة ومباشرة لتبادل الرسائل والصور والملفات وحتى المكالمات الصوتية والمرئية. ومع تطور هذه التطبيقات، لم تعد المحادثة النصية وحدها كافية، بل ظهرت مزايا إضافية مثل Stories والمرفقات وحالات الظهور، وهي عناصر رفعت مستوى التفاعل داخل التطبيق بشكل كبير.
في هذا الدليل العملي، سنعيد بناء الواجهة الرئيسية لتطبيق دردشة مستوحى من Facebook Messenger باستخدام إطار العمل Flutter. الهدف ليس فقط تقليد الشكل، بل فهم كيفية تنظيم الواجهة باستخدام نظام Widgets في Flutter بطريقة نظيفة وقابلة للتطوير.

سنقوم ببناء شاشة رئيسية تحتوي على العناصر التالية:
- شريط علوي مخصص بدلاً من
AppBarالتقليدي. - شريط بحث أنيق وسهل الاستخدام.
- قسم
Storiesقابل للتمرير أفقياً. - قائمة محادثات قابلة للتمرير عمودياً.
إنشاء مشروع Flutter جديد
قبل البدء، تأكد من تثبيت Flutter SDK وتجهيز بيئة التطوير بشكل صحيح. بعد ذلك أنشئ مشروعاً جديداً عبر الأمر التالي:
flutter create messengerUIبعد اكتمال إنشاء المشروع، انتقل إلى مجلد المشروع ثم شغّله باستخدام:
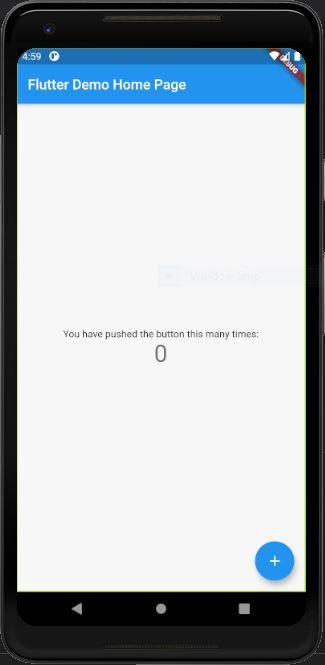
flutter runعند نجاح التشغيل، ستظهر لك الواجهة الافتراضية الخاصة بمشروع Flutter.
تجهيز بنية الملفات
نحتاج الآن إلى استبدال القالب الافتراضي ببنية أكثر ملاءمة للمشروع. أنشئ مجلداً باسم ./screens داخل مجلد ./lib، ثم أضف ملفاً جديداً باسم conversations.dart.
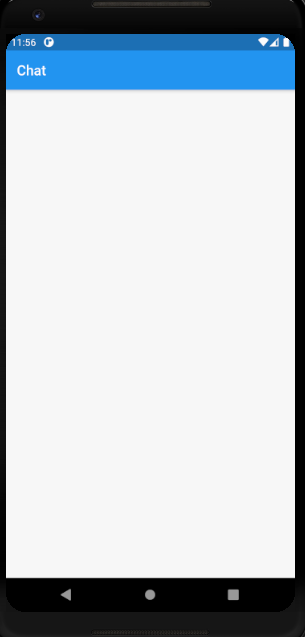
داخل هذا الملف، سننشئ فئة من نوع StatefulWidget تُرجع عنصراً من نوع Scaffold يحتوي على شريط علوي بسيط وجسم فارغ:
import 'package:flutter/material.dart';

class Conversations extends StatefulWidget {
  @override
  _ConversationsState createState() => _ConversationsState();
}

class _ConversationsState extends State<Conversations> {
  @override
  Widget build(BuildContext context) {
    return Scaffold(
      appBar: AppBar(
        title: Text("Chat"),
      ),
      body: Container(),
    );
  }
}
بعد ذلك، عدّل ملف main.dart لاستدعاء شاشة Conversations داخل الخاصية home في MaterialApp:
import 'package:flutter/material.dart';
import 'package:messangerUI/screens/conversations.dart';

void main() {
  runApp(MyApp());
}

class MyApp extends StatelessWidget {
  @override
  Widget build(BuildContext context) {
    return MaterialApp(
      title: 'Messenger Demo',
      debugShowCheckedModeBanner: false,
      theme: ThemeData(
        primarySwatch: Colors.blue,
        visualDensity: VisualDensity.adaptivePlatformDensity,
      ),
      home: Conversations(),
    );
  }
}
تخصيص الشريط العلوي في واجهة الدردشة
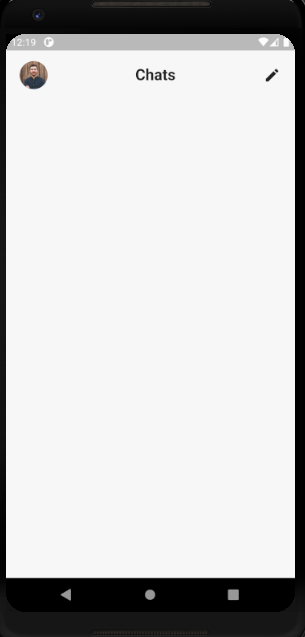
بدلاً من استخدام الخاصية appBar الجاهزة داخل Scaffold، سنبني شريطاً علوياً مخصصاً داخل body. السبب في ذلك هو أننا نريد أن تكون الشاشة كلها قابلة للتمرير، بما في ذلك الجزء العلوي.
سنستخدم ListView كعنصر رئيسي، ثم نضع داخله صفاً من نوع Row يحتوي على:
- صورة المستخدم الشخصية.
- عنوان الصفحة.
- أيقونة تعديل أو إنشاء محادثة.
Widget build(BuildContext context) {
  return Scaffold(
    body: SafeArea(
      child: Container(
        padding: EdgeInsets.only(left: 20, right: 20, top: 15),
        child: ListView(
          children: [
            Row(
              mainAxisAlignment: MainAxisAlignment.spaceBetween,
              children: <Widget>[
                Container(
                  width: 40,
                  height: 40,
                  decoration: BoxDecoration(
                    shape: BoxShape.circle,
                    image: DecorationImage(
                      image: NetworkImage("https://randomuser.me/api/portraits/men/11.jpg"),
                      fit: BoxFit.cover,
                    ),
                  ),
                ),
                Text(
                  "Chats",
                  style: TextStyle(fontSize: 22, fontWeight: FontWeight.bold),
                ),
                Icon(Icons.edit),
              ],
            ),
          ],
        ),
      ),
    ),
  );
}
هذا الأسلوب يمنحك مرونة أعلى في التحكم في توزيع العناصر والمسافات والشكل العام للواجهة.
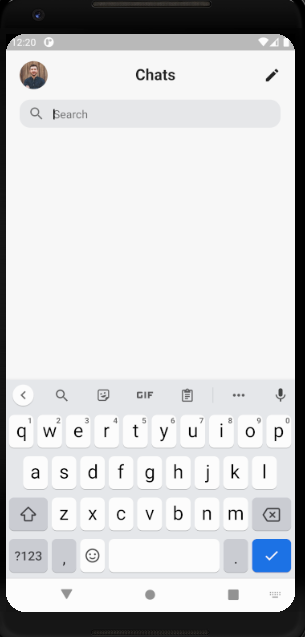
إضافة شريط البحث أسفل العنوان
وجود شريط بحث في تطبيقات المحادثة عنصر أساسي، لأنه يساعد المستخدم على الوصول السريع إلى الأشخاص أو الرسائل. سنضيف حقلاً من نوع TextField مزوداً بأيقونة بحث وتصميم بسيط.
أولاً، نحتاج إلى تعريف متحكم نصي من نوع TextEditingController:
TextEditingController _searchController = new TextEditingController();ثم نضيف شريط البحث أسفل الصف العلوي مباشرة:
body: SafeArea(
  child: Container(
    padding: EdgeInsets.only(left: 20, right: 20, top: 15),
    child: ListView(
      children: [
        Row(
          mainAxisAlignment: MainAxisAlignment.spaceBetween,
          children: <Widget>[
            Container(
              width: 40,
              height: 40,
              decoration: BoxDecoration(
                shape: BoxShape.circle,
                image: DecorationImage(
                  image: NetworkImage("https://randomuser.me/api/portraits/men/11.jpg"),
                  fit: BoxFit.cover,
                ),
              ),
            ),
            Text(
              "Chats",
              style: TextStyle(fontSize: 22, fontWeight: FontWeight.bold),
            ),
            Icon(Icons.edit),
          ],
        ),
        SizedBox(height: 15),
        Container(
          width: double.infinity,
          height: 40,
          decoration: BoxDecoration(
            color: Color(0xFFe9eaec),
            borderRadius: BorderRadius.circular(15),
          ),
          child: TextField(
            cursorColor: Color(0xFF000000),
            controller: _searchController,
            decoration: InputDecoration(
              prefixIcon: Icon(
                Icons.search,
                color: Color(0xFF000000).withOpacity(0.5),
              ),
              hintText: "Search",
              border: InputBorder.none,
            ),
          ),
        ),
      ],
    ),
  ),
);
لاحظ استخدام SizedBox لإنشاء مسافة بين العناصر، وهي طريقة بسيطة ومنظمة للحفاظ على تناسق التصميم.
بناء قسم القصص Stories بشكل احترافي
ميزة Stories أصبحت جزءاً أساسياً من معظم التطبيقات الاجتماعية الحديثة. سنضيف هذا القسم أسفل شريط البحث، بحيث يظهر للمستخدمين على هيئة صور دائرية مع أسماء مختصرة أسفلها.
إعداد بيانات تجريبية للقصص
قبل بناء الواجهة، نحتاج إلى قائمة بيانات تجريبية تمثل المستخدمين. كل عنصر سيحمل معلومات مثل الاسم، رابط الصورة، حالة الاتصال، وما إذا كان لدى المستخدم قصة منشورة أم لا.
List storyList = [
  {
    "name": "Novac",
    "imageUrl": "https://randomuser.me/api/portraits/men/31.jpg",
    "isOnline": true,
    "hasStory": true,
  },
  {
    "name": "Derick",
    "imageUrl": "https://randomuser.me/api/portraits/men/81.jpg",
    "isOnline": false,
    "hasStory": false,
  },
  {
    "name": "Mevis",
    "imageUrl": "https://randomuser.me/api/portraits/women/49.jpg",
    "isOnline": true,
    "hasStory": false,
  },
  {
    "name": "Emannual",
    "imageUrl": "https://randomuser.me/api/portraits/men/35.jpg",
    "isOnline": true,
    "hasStory": true,
  },
  {
    "name": "Gracy",
    "imageUrl": "https://randomuser.me/api/portraits/women/56.jpg",
    "isOnline": false,
    "hasStory": false,
  },
  {
    "name": "Robert",
    "imageUrl": "https://randomuser.me/api/portraits/men/36.jpg",
    "isOnline": false,
    "hasStory": true,
  }
];
إنشاء دالة خاصة لعرض القصص
أفضل ممارسة هنا هي فصل هذا الجزء في دالة مستقلة، حتى يبقى الكود منظماً وسهل الصيانة:
_stories() {
  return SingleChildScrollView(
    scrollDirection: Axis.horizontal,
    child: Row(
      children: <Widget>[
        Padding(
          padding: EdgeInsets.only(right: 20),
          child: Column(
            children: <Widget>[
              Container(
                width: 60,
                height: 60,
                decoration: BoxDecoration(
                  shape: BoxShape.circle,
                  color: Color(0xFFe9eaec),
                ),
                child: Center(
                  child: Icon(Icons.add, size: 33),
                ),
              ),
              SizedBox(height: 10),
              SizedBox(
                width: 75,
                child: Align(
                  child: Text('Your Story', overflow: TextOverflow.ellipsis),
                ),
              )
            ],
          ),
        ),
        Row(
          children: List.generate(storyList.length, (index) {
            return Padding(
              padding: const EdgeInsets.only(right: 20),
              child: Column(
                children: <Widget>[
                  Container(
                    width: 60,
                    height: 60,
                    child: Stack(
                      children: <Widget>[
                        storyList[index]['hasStory']
                            ? Container(
                                decoration: BoxDecoration(
                                  shape: BoxShape.circle,
                                  border: Border.all(
                                    color: Colors.blueAccent,
                                    width: 3,
                                  ),
                                ),
                                child: Padding(
                                  padding: const EdgeInsets.all(3.0),
                                  child: Container(
                                    width: 75,
                                    height: 75,
                                    decoration: BoxDecoration(
                                      shape: BoxShape.circle,
                                      image: DecorationImage(
                                        image: NetworkImage(storyList[index]['imageUrl']),
                                        fit: BoxFit.cover,
                                      ),
                                    ),
                                  ),
                                ),
                              )
                            : Container(
                                width: 70,
                                height: 70,
                                decoration: BoxDecoration(
                                  shape: BoxShape.circle,
                                  image: DecorationImage(
                                    image: NetworkImage(storyList[index]['imageUrl']),
                                    fit: BoxFit.cover,
                                  ),
                                ),
                              ),
                        storyList[index]['isOnline']
                            ? Positioned(
                                top: 38,
                                left: 42,
                                child: Container(
                                  width: 20,
                                  height: 20,
                                  decoration: BoxDecoration(
                                    color: Color(0xFF66BB6A),
                                    shape: BoxShape.circle,
                                    border: Border.all(
                                      color: Color(0xFFFFFFFF),
                                      width: 3,
                                    ),
                                  ),
                                ),
                              )
                            : Container()
                      ],
                    ),
                  ),
                  SizedBox(height: 10),
                  SizedBox(
                    width: 75,
                    child: Align(
                      child: Text(
                        storyList[index]['name'],
                        overflow: TextOverflow.ellipsis,
                      ),
                    ),
                  )
                ],
              ),
            );
          }),
        )
      ],
    ),
  );
}
في هذا الجزء استخدمنا SingleChildScrollView مع الخاصية scrollDirection: Axis.horizontal حتى يصبح قسم القصص قابلاً للتمرير أفقياً. كما اعتمدنا على List.generate لإنشاء العناصر ديناميكياً اعتماداً على البيانات.
إذا كان المستخدم يملك قصة، نعرض إطاراً أزرق حول صورته. وإذا كان متصلاً، نضيف مؤشراً أخضر صغيراً فوق الصورة.
بعد ذلك، نستدعي الدالة داخل عناصر ListView:
body: SafeArea(
  child: Container(
    padding: EdgeInsets.only(left: 20, right: 20, top: 15),
    child: ListView(
      children: [
        Row(
          mainAxisAlignment: MainAxisAlignment.spaceBetween,
          children: <Widget>[
            Container(
              width: 40,
              height: 40,
              decoration: BoxDecoration(
                shape: BoxShape.circle,
                image: DecorationImage(
                  image: NetworkImage("https://randomuser.me/api/portraits/men/11.jpg"),
                  fit: BoxFit.cover,
                ),
              ),
            ),
            Text(
              "Chats",
              style: TextStyle(fontSize: 22, fontWeight: FontWeight.bold),
            ),
            Icon(Icons.edit),
          ],
        ),
        SizedBox(height: 15),
        Container(
          width: double.infinity,
          height: 40,
          decoration: BoxDecoration(
            color: Color(0xFFe9eaec),
            borderRadius: BorderRadius.circular(15),
          ),
          child: TextField(
            cursorColor: Color(0xFF000000),
            controller: _searchController,
            decoration: InputDecoration(
              prefixIcon: Icon(
                Icons.search,
                color: Color(0xFF000000).withOpacity(0.5),
              ),
              hintText: "Search",
              border: InputBorder.none,
            ),
          ),
        ),
        SizedBox(height: 20),
        _stories(),
      ],
    ),
  ),
);
إنشاء قائمة المحادثات أسفل القصص
الآن نصل إلى القسم الأهم في الشاشة: قائمة المحادثات. هذا الجزء يعرض اسم المستخدم، صورته، آخر رسالة، وقت الإرسال، إلى جانب مؤشرات القصة أو حالة الاتصال.
إعداد بيانات المحادثات الوهمية
سننشئ قائمة جديدة باسم conversationList، تشبه بيانات القصص ولكنها تتضمن أيضاً الرسالة والوقت:
List conversationList = [
  {
    "name": "Novac",
    "imageUrl": "https://randomuser.me/api/portraits/men/31.jpg",
    "isOnline": true,
    "hasStory": true,
    "message": "Where are you?",
    "time": "5:00 pm"
  },
  {
    "name": "Derick",
    "imageUrl": "https://randomuser.me/api/portraits/men/81.jpg",
    "isOnline": false,
    "hasStory": false,
    "message": "It's good!!",
    "time": "7:00 am"
  },
  {
    "name": "Mevis",
    "imageUrl": "https://randomuser.me/api/portraits/women/49.jpg",
    "isOnline": true,
    "hasStory": false,
    "message": "I love You too!",
    "time": "6:50 am"
  },
  {
    "name": "Emannual",
    "imageUrl": "https://randomuser.me/api/portraits/men/35.jpg",
    "isOnline": true,
    "hasStory": true,
    "message": "Got to go!! Bye!!",
    "time": "yesterday"
  },
  {
    "name": "Gracy",
    "imageUrl": "https://randomuser.me/api/portraits/women/56.jpg",
    "isOnline": false,
    "hasStory": false,
    "message": "Sorry, I forgot!",
    "time": "2nd Feb"
  },
  {
    "name": "Robert",
    "imageUrl": "https://randomuser.me/api/portraits/men/36.jpg",
    "isOnline": false,
    "hasStory": true,
    "message": "No, I won't go!",
    "time": "28th Jan"
  },
  {
    "name": "Lucy",
    "imageUrl": "https://randomuser.me/api/portraits/women/56.jpg",
    "isOnline": false,
    "hasStory": false,
    "message": "Hahahahahaha",
    "time": "25th Jan"
  },
  {
    "name": "Emma",
    "imageUrl": "https://randomuser.me/api/portraits/women/56.jpg",
    "isOnline": false,
    "hasStory": false,
    "message": "Been a while!",
    "time": "15th Jan"
  }
];
بناء واجهة قائمة المحادثات
سنضع هذا الجزء داخل دالة منفصلة أيضاً، وهو ما يساعد على جعل الملف أكثر ترتيباً ووضوحاً:
_conversations(BuildContext context) {
  return Column(
    children: List.generate(conversationList.length, (index) {
      return InkWell(
        child: Padding(
          padding: const EdgeInsets.only(bottom: 20),
          child: Row(
            children: <Widget>[
              Container(
                width: 60,
                height: 60,
                child: Stack(
                  children: <Widget>[
                    conversationList[index]['hasStory']
                        ? Container(
                            decoration: BoxDecoration(
                              shape: BoxShape.circle,
                              border: Border.all(color: Colors.blueAccent, width: 3),
                            ),
                            child: Padding(
                              padding: const EdgeInsets.all(3.0),
                              child: Container(
                                width: 75,
                                height: 75,
                                decoration: BoxDecoration(
                                  shape: BoxShape.circle,
                                  image: DecorationImage(
                                    image: NetworkImage(conversationList[index]['imageUrl']),
                                    fit: BoxFit.cover,
                                  ),
                                ),
                              ),
                            ),
                          )
                        : Container(
                            width: 70,
                            height: 70,
                            decoration: BoxDecoration(
                              shape: BoxShape.circle,
                              image: DecorationImage(
                                image: NetworkImage(conversationList[index]['imageUrl']),
                                fit: BoxFit.cover,
                              ),
                            ),
                          ),
                    conversationList[index]['isOnline']
                        ? Positioned(
                            top: 38,
                            left: 42,
                            child: Container(
                              width: 20,
                              height: 20,
                              decoration: BoxDecoration(
                                color: Color(0xFF66BB6A),
                                shape: BoxShape.circle,
                                border: Border.all(color: Color(0xFFFFFFFF), width: 3),
                              ),
                            ),
                          )
                        : Container()
                  ],
                ),
              ),
              SizedBox(width: 20),
              Column(
                crossAxisAlignment: CrossAxisAlignment.start,
                children: <Widget>[
                  Text(
                    conversationList[index]['name'],
                    style: TextStyle(fontSize: 17, fontWeight: FontWeight.w500),
                  ),
                  SizedBox(height: 5),
                  SizedBox(
                    width: MediaQuery.of(context).size.width - 135,
                    child: Text(
                      conversationList[index]['message'] + " - " + conversationList[index]['time'],
                      style: TextStyle(
                        fontSize: 15,
                        color: Color(0xFF000000).withOpacity(0.7),
                      ),
                      overflow: TextOverflow.ellipsis,
                    ),
                  )
                ],
              )
            ],
          ),
        ),
      );
    }),
  );
}
استخدمنا هنا InkWell لتجهيز كل عنصر بحيث يصبح قابلاً للنقر لاحقاً، وهو أمر مهم إذا رغبت بفتح صفحة المحادثة عند الضغط على العنصر.
ثم نستدعي الدالة أسفل قسم القصص مباشرة:
body: SafeArea(
  child: Container(
    padding: EdgeInsets.only(left: 20, right: 20, top: 15),
    child: ListView(
      children: [
        Row(
          mainAxisAlignment: MainAxisAlignment.spaceBetween,
          children: <Widget>[
            Container(
              width: 40,
              height: 40,
              decoration: BoxDecoration(
                shape: BoxShape.circle,
                image: DecorationImage(
                  image: NetworkImage("https://randomuser.me/api/portraits/men/11.jpg"),
                  fit: BoxFit.cover,
                ),
              ),
            ),
            Text(
              "Chats",
              style: TextStyle(fontSize: 22, fontWeight: FontWeight.bold),
            ),
            Icon(Icons.edit),
          ],
        ),
        SizedBox(height: 15),
        Container(
          width: double.infinity,
          height: 40,
          decoration: BoxDecoration(
            color: Color(0xFFe9eaec),
            borderRadius: BorderRadius.circular(15),
          ),
          child: TextField(
            cursorColor: Color(0xFF000000),
            controller: _searchController,
            decoration: InputDecoration(
              prefixIcon: Icon(
                Icons.search,
                color: Color(0xFF000000).withOpacity(0.5),
              ),
              hintText: "Search",
              border: InputBorder.none,
            ),
          ),
        ),
        SizedBox(height: 20),
        _stories(),
        SizedBox(height: 20),
        _conversations(context)
      ],
    ),
  ),
);
أفضل الممارسات عند بناء واجهة دردشة في Flutter
1. تقسيم الواجهة إلى دوال صغيرة
بدلاً من وضع كل شيء داخل الدالة build()، من الأفضل فصل الأقسام مثل _stories() و_conversations(). هذا يجعل الكود:
- أسهل في القراءة.
- أسرع في الصيانة.
- أبسط في الاختبار والتطوير لاحقاً.
2. استخدام بيانات وهمية قبل ربط الواجهة بالخلفية
إنشاء قوائم مثل storyList وconversationList خطوة مهمة لتجربة التصميم بسرعة قبل ربط التطبيق بقاعدة بيانات أو API.
3. الاستفادة من قابلية التمرير المتعددة
ميزة الجمع بين ListView للتمرير العمودي وSingleChildScrollView للتمرير الأفقي تعطي تجربة مشابهة للتطبيقات الاحترافية المنتشرة حالياً.
4. الانتباه لتناسق المسافات والأحجام
استخدام عناصر مثل SizedBox وPadding وBorderRadius ليس تفصيلاً شكلياً فقط، بل يؤثر مباشرة على جودة تجربة المستخدم.
ماذا تعلمت من هذا المشروع؟
من خلال هذا التطبيق، يمكنك فهم عدد من المفاهيم العملية المهمة في Flutter، مثل:
- بناء واجهات مخصصة باستخدام
Widgets. - تنظيم الشاشة عبر
ListViewوRowوColumn. - استخدام
StackوPositionedلإظهار مؤشرات الحالة. - إنشاء واجهات ديناميكية عبر
List.generate. - فصل المنطق البصري إلى وحدات صغيرة قابلة لإعادة الاستخدام.
هذه الأسس مفيدة جداً إذا كنت تخطط لاحقاً لبناء تطبيق دردشة متكامل يدعم الرسائل الفعلية، الإشعارات، الحالات، أو حتى الاتصال المباشر.
الخلاصة التقنية
يُظهر هذا المثال بوضوح قوة Flutter في بناء واجهات تطبيقات حديثة بسرعة ومرونة عاليتين. بفضل بنية Widget-based UI يمكنك تركيب واجهات معقدة نسبياً باستخدام عدد محدود من المكونات، مع الحفاظ على نظافة الكود وسهولة تطويره مستقبلاً. وإذا أردت الانتقال من مرحلة المحاكاة إلى مشروع حقيقي، فستكون الخطوة التالية الطبيعية هي ربط هذه الواجهة مع مصدر بيانات فعلي مثل Firebase أو واجهات REST API للحصول على تجربة دردشة كاملة وعملية.